Managing fields and choosing field types
Once you have created a tab, it's time to define the information you will track. Builders do this by adding fields to the tab. This article reviews:
- Inventory of all possible field types
- Adding a new field to a tab
- Modifying an existing field
- Deleting a field
Be sure to read the important notes about modifying and deleting field types, shown at the bottom of each section.
Inventory of all possible field types
GraceBlocks supports adding the following types of fields:
| Field type | Description |
| Short text | Users can enter no more than 255 characters in this field, possibly less, based on the field attributes. While the long text field type supports more text in the field, this field type is recommended if exporting and/or reporting on this data might be necessary. |
| Long text | Users can enter up to 10,000 characters in this field. This field type is good for long descriptive text, but if exporting and/or reporting on this data might be necessary, consider using the short text field type instead. |
| Masked text | Users will only be able to see data entered according to the mask setting on the field (partial or full masking). This field is only available on pro plans or higher. |
| RTF | Users can enter rich text into this field, including bold, italics, hyperlinks, and more. This field is only available with paid plans. |
| Single select |
Builders can enter a list of possible values. Users can select one value from the pre-defined list.
|
| Multiple select | Builders can enter a list of possible values. Users can select one or more values from the pre-defined list. |
| Attachments | Users can add one, or possibly multiple, attachments into this field. |
| Relational |
Builders can specify a relational tab in the same Block or (if on a paid plan) other Blocks where data exists. Users can select one or more values from the selected tab's dataset.
|
| Lookup | Builders can specific fields from any relational tab and pull them through to a new tab based on a relational value. |
| Number | Users can enter a formatted numeric value of general, currency-related, or percent formats. |
| Date | Users can enter a formatted date value. |
| Counter | Users can see a read-only number that incrementally counts a number for each record. |
| Phone number | Users can enter a valid phone number into this field. By default, numbers are designated as mobile and support text messaging using the Messaging Thread field type. If that is not desired, disable the mobile designation under More field attributes. |
| Messaging thread | Users can exchange messages with known contacts. When a builder uses this field for the first time in a Zone, it activates messaging inside of GraceBlocks. |
| Users can enter a valid email address into this field. The value becomes a clickable value that will launch to support sending emails easily. (Sent emails are not currently tracked by GraceBlocks). | |
| URL | Users can enter a valid URL into this field. The value entered will be a clickable hyperlink. |
| Checkbox | Users can click a single checkbox. It can be checked or unchecked. |
| Collaborator | You can assign users to records and activate notifications if desired using the collaborator field. |
| Formula | Builders can define a set of functions that provide instructions or operations that can be used to process and manipulate data within GraceBlocks. It allows users to perform calculations, transformations, or derive new data based on existing data in a structured and efficient manner. |
| Added on | This field displays the date the record was added to the system. This field is system-generated. It is not editable. |
| This field shows the GraceBlocks user who created the record. This field is system-generated. It is not editable. | |
| This field displays the date the record was last updated in the system. This field is system-generated. It is not editable. | |
| This field shows the GraceBlocks user who created the record. This field is system-generated. It is not editable. |
Adding a new field
Block builders are authorized to add new fields to any tab inside a Block by following the steps outlined below.
| Step | Action | Visual |
| 1 |
From within a tab using spreadsheet view, click Add field. This option is always to the far right of the column for builders.
or
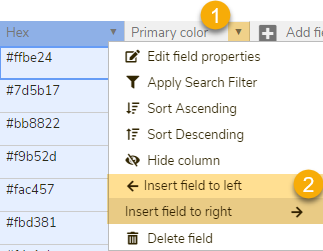
Alternatively, if you want the new field to be inserted in a specific location on the tab, click the edit dropdown for the field, and select Insert field to left or Insert field to right.
The Edit field properties modal displays. |
or
|
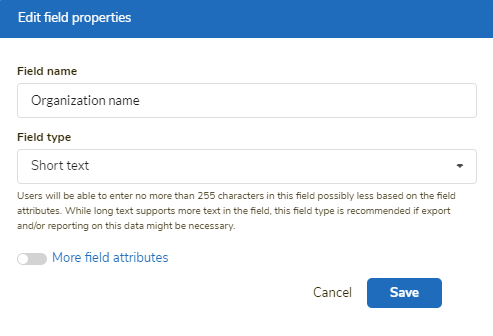
| 2 | Enter the Field name. This will be the name referenced for the field at the top of the column. A database name (such as Field_28 in this example) is provided as a starting point, but be sure to edit this value to something that will help you understand the data that will be stored in the field. | 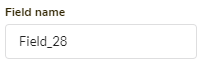 |
| 3 | Specify the desired field type for the field. By default, the short text type is selected. Choose the desired value from the list. | 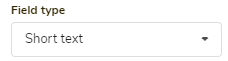 |
| 4 |
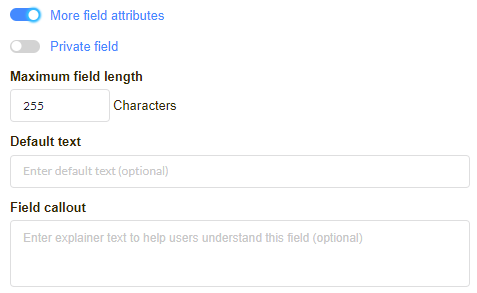
Define any necessary additional field attributes. For some fields, it is mandatory to specify additional attributes, and this section will expand automatically to show the options. Other times, making changes here is optional. Additional settings vary, based on the field type. Click on a specific field type in the inventory above to learn more about each field's individual additional field attributes.
In the example provided (for short text), the options allow setting the field to be private, specifying a maximum field length, default text which would appear in each cell as the starting point for the field, as well as helpful callout text that can help explain the field's purpose to users of the Block (and that appears as a callout, adjacent to the field name).
🔔Private fields are only accessible by authorized users according to their Block role and the tab's security access settings. |
Disabled example:
Enabled example:
|
| 5 |
Click Save. The loading image appears while the new field is being added to the system. |
|


Modifying a field
Block builders are authorized to edit a tab's fields inside a Block by following the steps outlined below.
| Step | Action | Visual |
| 1 |
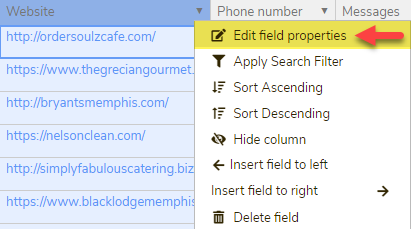
From within a tab using spreadsheet view, click the edit dropdown for the field and click Edit field properties.
The Edit field properties modal displays. |
|
| 2 |
Edit the field label and any other field attributes that can be edited.
Some edit options are disabled (see note below for more on this) to safeguard the system. However, any permitted edits are allowed, and fields will be updated based on the specified changes. |
|
| 3 |
Click Save. The loading image appears while the system evaluates the requested changes. Changes could apply automatically, or they may require confirmation. (See step 4.)
|
|
| 4 |
If the field you are modifying has data inside it already, you need to confirm your edits before you proceed. Read the message in the Edit field warning modal carefully, and follow the instructions to continue. This warning explains what data may be lost in the process of converting the field to a new field type.
|
|

Important notes
🔔 Depending on the type of field, some edit options may be disabled to ensure system stability. For example, it's not possible to edit certain field types once they are used. (Attachments, Lookups, and Relational field types cannot be changed. If you no longer want a field of this type, you need to remove the field entirely by deleting it.)
🔔 Once field modifications are applied, the changes are permanent and cannot be undone.
Deleting a field
Block builders are authorized to delete fields of a tab inside a Block by following the steps outlined below.
| Step | Action | Visual |
| 1 |
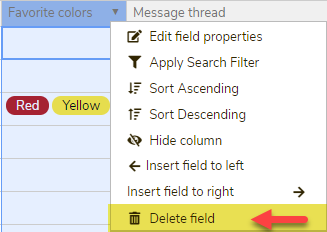
From within a tab using spreadsheet view, click the edit dropdown for the field, and click Delete field.
The Delete field confirmation message displays. |
|
| 2 |
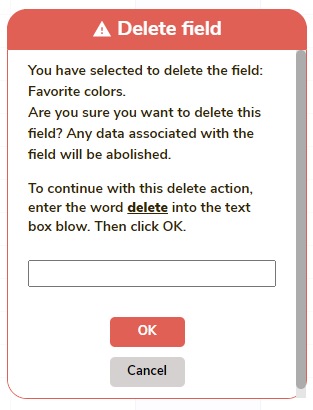
Read the Delete field message carefully before proceeding, and follow the instructions on the page to complete the delete transaction.
You must follow the instructions on the page for the transaction to complete successfully and delete the field. |
|
Important notes
🔔 Once a field deletion is applied, the change is permanent and cannot be undone.