Managing columns
The columns feature in GraceBlocks lets you control which columns display, their order, as well as sorting and grouping. This feature lets you easily control the information that displays so that you can ensure that it is most relevant to your needs. Once you set the column ordering and visibility, the display is "sticky" and "just for you." This means that if you leave the tab and come back later, your last applied column formatting will still be working for you, and only for you. Other users can set their own column settings to align with what they are looking for. Your settings do not disrupt what they are seeing, and their settings do not affect what you are seeing. Also, if you are repeatedly looking at the same set of columns, you can create a bookmark to make it easy to return to that layout of the information display. This article covers:
Using the columns feature
Set the display how you want by completing the following steps:
| Step | Action | Visual | ||||
| 1 |
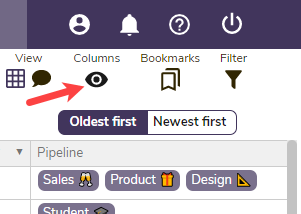
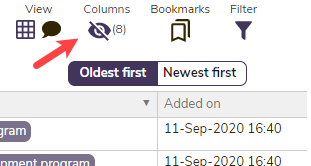
From any view of a tab inside GraceBlocks, click the Columns icon in the Actions toolbar. (If any columns are hidden, the icon has a slash through it and a number that indicates how many columns are hidden.)
The columns modal appears.
|
No columns are currently hidden.
or
8 columns are currently hidden. |
||||
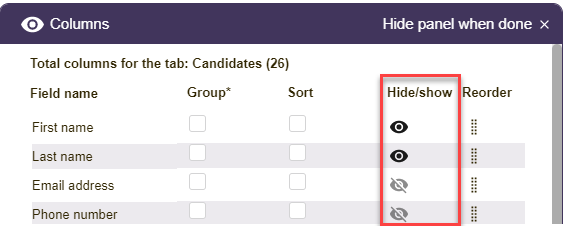
| 2 |
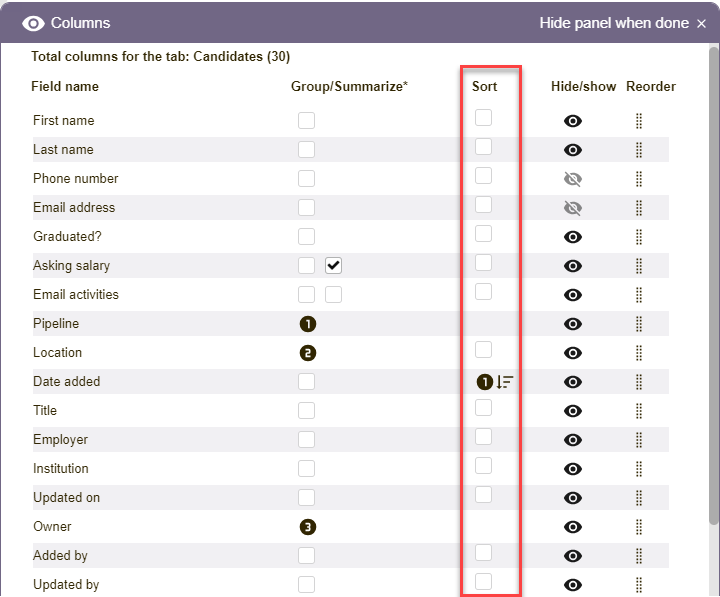
For each column in the list, click the Hide / show (eye) icon to toggle between whether that column will be shown or hidden in spreadsheet view.
|
 |
||||
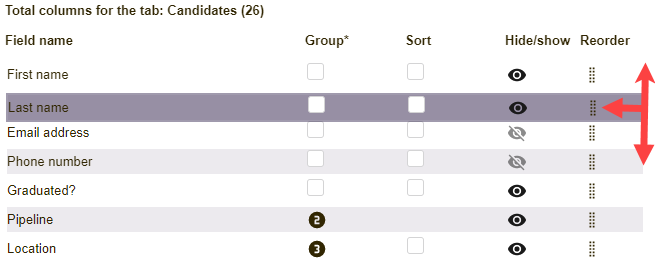
| 3 |
Click and drag the Reorder icon for a column to change the order in which the columns will appear (top ➡ bottom in the Columns configuration = left ➡ right in the tab display). Fields that are configured to show display in the tab in the configured order. |
 |
||||
| 4 |
In the Sort column, click the checkbox of up to 3 columns (1st, 2nd, 3rd level sort) that you'd like to sort the information by.
This feature is only enabled with paid plans. (Single-level sorting is still supported on free plans from each view).
When used the information in the view will display in the sort order specified. |
|
||||
| 5 |
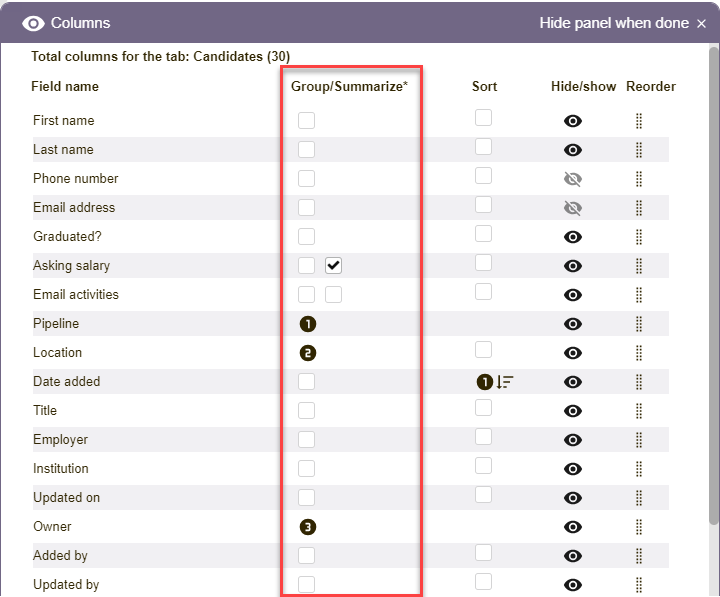
In the Group/Summarize columns, click the checkbox of up to 3 columns (1st, 2nd, 3rd level sort) that you'd like to group the information by.
Then, deselect any numeric fields you do not want to be summarized when you are viewing grouped records. Numeric summaries when included are (Sum, Average, Min, Max, Median, and Range) and will appear at the top of each number column where enabled for each grouped section.
This feature is only enabled with paid plans and only works in quick view. When used, the information in the view will display grouped by what is specified. |
|
||||
| 6 |
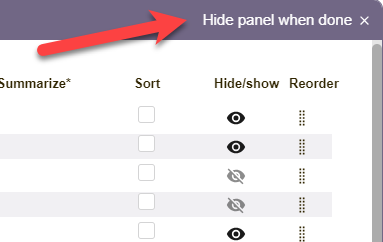
Click Hide panel when done to close the modal. The page refreshes with the new column settings applied. |
|
||||
| 7 |
The Columns icon updates to reflect whether and how many columns are hidden with the updated settings. |
|


Important notes about using the columns feature
🔔 Column configuration is sticky, which means that after you set the column configuration, if you leave and then return to the tab, they maintain the display and ordering you set. Builders can even set default column ordering and display by configuring a public default bookmark. For this reason, it is important to understand that if a number appears with the column icon, it means columns are hidden from your view. Click the column icon to make adjustments, if needed.
 |
Columns are hidden. The count tells how many. In this case, 8 columns are hidden. |
 |
No columns are currently hidden. |
🔔 If you delete a column used in Grouping definitions the grouping feature will appear grouped by nothing and will not be the desired display. To resolve this, click the column icon again to reload the page in the updated iteration that excludes the deleted field automatically. If this view is a bookmark, you will also want to edit and resave the bookmark to eliminate consideration of the deleted field when rendering the display.
🔔 Column configuration has no impact on the details page. All data will show in the details page, regardless of what is configured for columns.
🔔 The columns order and visibility settings (2 and 3 above) only applies to quickview and spreadsheet view. It has no application in messaging view.
🔔 The grouping setting (5 above) only applies to quickview It has no application in messaging view or spreadsheet view.
🔔 Make common column layouts easily accessible by creating bookmarks.
🔔 Want to create a default column configuration that users first see? For example, let's say you only want to show first name, last name, and status in the spreadsheet view and leave all other information about the person to be explored from the details page. Builders can do this by creating a public default bookmark. Learn more here: bookmarks.
🔔 When a user updates their column settings, it is only for their personal user session. Individual column settings by users have no impact on what other users see.
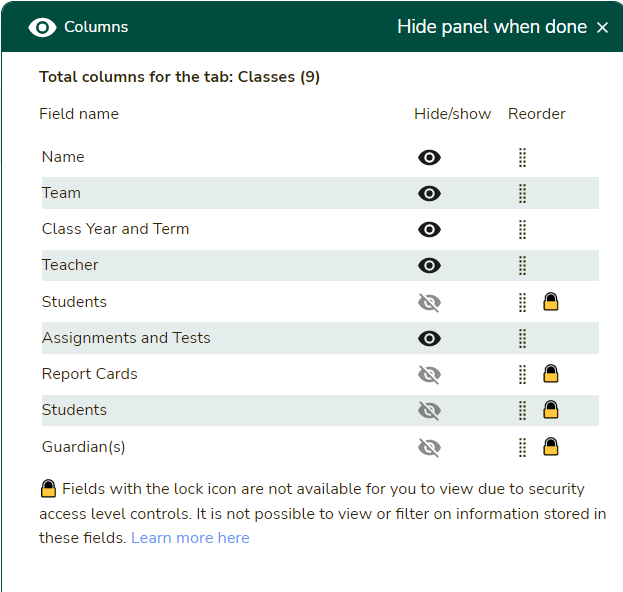
🔔 It is possible for a user to have columns they can't unhide. This can occur if there are relational fields or lookups on the tab that the user is not authorized to view according to their role and security access level. If a field has a lock icon (🔒 ), then the field can not be un-hidden for this reason. A note at the bottom of the column modal will also inform the user about the meaning of the lock icon, as illustrated below.)