Managing Zone settings
If you are a Zone owner, you are authorized to manage the settings for a Zone. Critical information about the Zone is managed in the Zone settings. Each area of Zone settings is outlined in this article:
- Accessing Zone settings
- Managing Zone properties
- Managing Plan information and understanding Zone Blocks
- Managing Zone messaging funds and phone numbers
- Managing payment information
- Reviewing Zone users (owners and builders only)
- Managing invoice delivery
- Understanding Zone credit
Accessing Zone settings
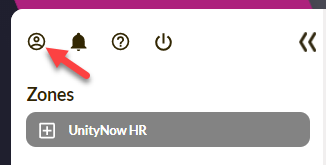
Only Zone owners have access to Zone settings. To make someone a Zone owner, follow the steps outlined below.
| Step | Action | Visual |
| 1 |
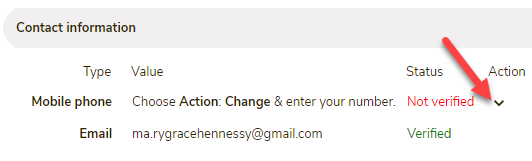
Confirm with the user to be promoted to Zone owner that they have a validated phone number linked to their GraceBlocks profile. If they still need to complete the steps to add and validate a phone number, they can follow the steps outlined here: Managing my profile > Managing your contact information. |
|
| 2 |
In the Zone Users block for your Zone, update the user's Zone Role to Zone owner. Review and follow the steps outlined here: Managing Zone users |
 |
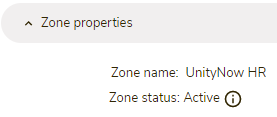
Managing Zone properties
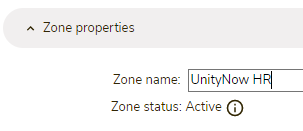
The first section of the Zone settings page is Zone properties. Each Zone has two main properties: Zone name and Zone status. You can change the Zone name, as described below, but you cannot change the status of a Zone from the Zone Settings page because you cannot be inside a Zone unless it is active. If you wish to deactivate a Zone, you can do so from your user profile page.
Managing the Zone name
Any edits made will be saved in real-time automatically.
| Step | Action | Visual |
| 1 |
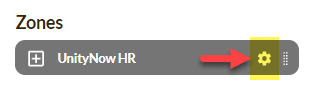
From the GraceBlocks homepage, move the cursor over the desired Zone name and click the Settings (gear) icon. The Zone settings page displays with the first section being Zone properties. |
 |
| 2 |
Click the Zone name value if you wish to edit it. The Zone name changes from view mode to edit mode and once you click enter or out of the cell, the new name will be saved for the Zone. 🔔 The updated name will appear on refresh. |
 |
| 3 |
By default, unless the user explicitly logs out, they will stay signed in for 30 days for the Zone on their device. You can increase or decrease this time period by changing the value stored here. Any edits made will save automatically. |
 |
| 4 |
If you wish to activate multifactor authentication for all of the users of this Zone, toggle on this option. 🔔 This setting only applies to direct username/password accounts. |
 |
| 5 |
Change the name of the Zone to the name you would like to use. Then, click out of the field. The field automatically saves the newly entered value. |
 |
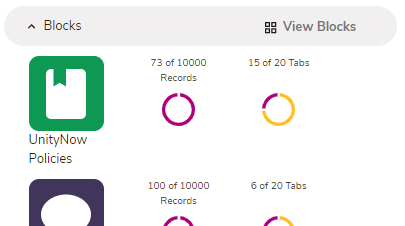
Managing plan information and understanding Zone Blocks
The Plan information section of the page displays the plan information for the Zone. By default, all Zones start on the free plan. The Zone plan displays just to the left of the Change Plan button. This section illustrates the utilization, relative to what is available, for the selected plan. See How to upgrade or change your GraceBlocks plan.

The amount of information stored inside a Block, as it relates to rows and attachments, can also affect how you align to your current plan's limits. For this reason, the right panel of the page lists all the Zone Blocks and what is available in each Block for the selected plan.
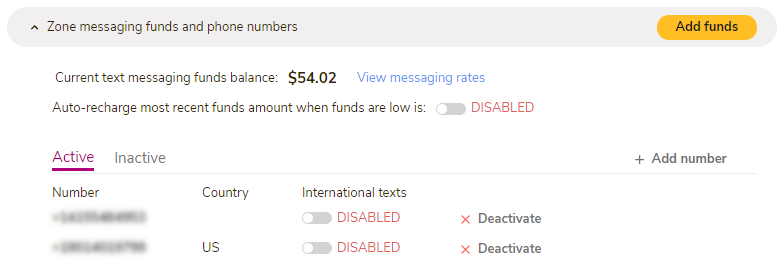
Managing Zone messaging funds and phone numbers
The Zone messaging funds and phone numbers section of the page displays messaging information for the Zone. In this section, you can at a glance see your funds balance, understand messaging rates, add more funds, add new numbers, deactivate existing numbers, and choose whether international texting or auto-recharge options are enabled. See Messaging management and pricing.
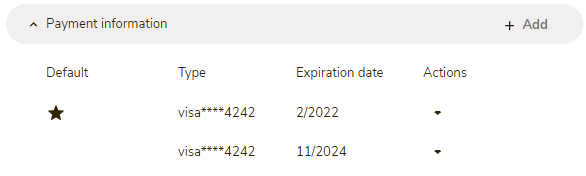
Managing payment information
The Payment information section of the page displays any payment information that has been saved for the Zone. When a Zone is upgraded for the first time, the payment information is saved automatically into this section as the default payment method. You can add other payment methods at any time, and you can update the default payment method. You can also delete outdated payment methods. See Managing payment methods.
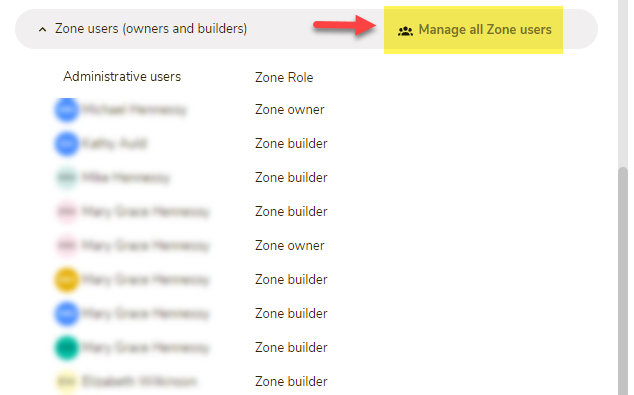
Reviewing Zone users (owners and builders only)
The Zone users section provides a summary list of all Zone users who have primary administrative rights into the Zone as either a Zone owner or Zone builder. A quick link in this section (Manage all Zone users) links directly to the User management Block for the Zone. To learn more about managing Zone users, see Managing Zone users.
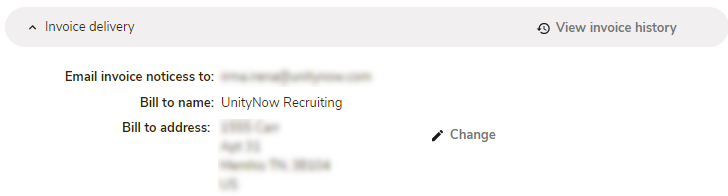
Managing invoice delivery
The Invoice delivery section of the page provides billing information for invoices. In this section, you can update how invoices are addressed and where they are sent. In addition, you can access all invoices that were previously delivered from this section. To learn how to access invoice history, as well as change invoice delivery information, see Invoice history and delivery notices.
Understanding Zone credit
It is possible to receive a credit for unused time on a plan for a Zone. This may happen if you change plan payment options (from annual to monthly, for example). It can also happen if you deactivate a Zone that was on a paid plan, and later choose to reactivate the Zone. When these types of changes occur, you are issued credit that you can apply only for payment on future paid plan renewals or upgrades. The credit will be automatically drawn down until depleted before future charges occur on your default payment method. If you have credit, it appears in the bottom left corner of the Settings page, just below the Invoice delivery section.
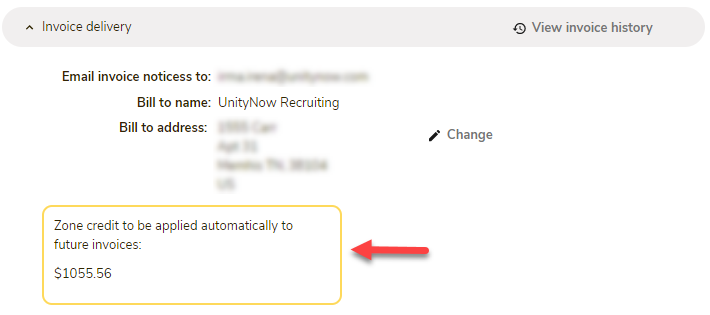
🔔 If you have credit and you make a payment (such as adding messaging funds), you need to fully refresh the page to see the credit number change to reflect the newest purchase.