Cancelling payment / Zone deactivation / Zone reactivation
To fully cancel the monthly payments for a specific Zone, Zone owners can deactivate the Zone from the My profile page.
When a Zone owner deactivates a Zone, GraceBlocks halts any subscription plan or monthly phone number fees that are associated with the Zone so that future charges are not applied. Any existing balance will remain as credit that can be applied in the future if anyone who was a Zone owner at the time of cancellation chooses to reactivate the Zone during the available reactivation period.
At cancellation, the Zone is told how much time they have to consider reactivation before the deactivated Zone will be abolished. This time period can range from three to twelve months, depending on the plan of the Zone that is being deactivated.
Deactivate a Zone
When you are a Zone owner, follow these steps to deactivate the Zone:
| Step | Action | Visual |
| 1 |
Click the My profile icon. The My profile page for your account appears. |
 |
| 2 |
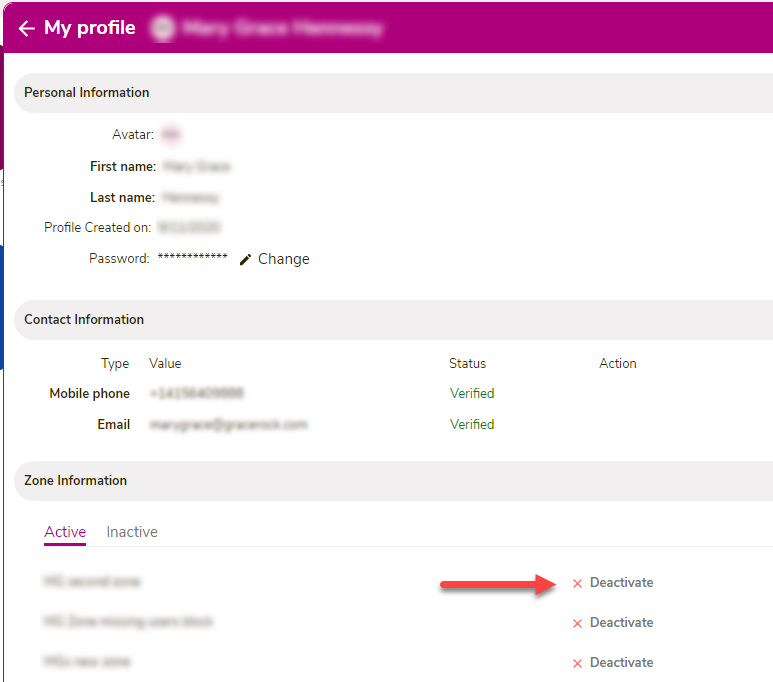
Scroll to the Zone owner information section. This section displays all Zones where you are an owner. By default, the Active Zones display, but you can also click Inactive to view the Inactive Zones. Click Deactivate for the Zone you wish to deactivate. |
 |
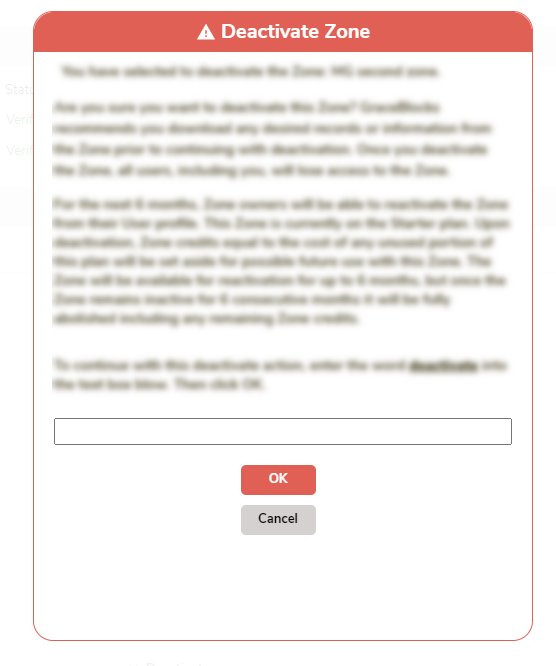
| 3 | Carefully review the confirmation message that displays. This message defines the implications of the cancellation to all users and to future payments for this Zone, once it is deactivated. If you want to proceed with the deactivation, follow the instructions on this page. |
 |
| 4 |
If you complete step 3 by clicking OK, confirm that the Zone is now deactivated by clicking Inactive in the Zone owner information section and verifying that the Zone you deactivated appears in the list of Inactive Zones. |
 |
🔔 To learn about account deactivation visit: Deactivating your GraceBlocks profile.
🔔 You and any other Zone owners for that Zone will be able to see the deactivated Zone, with the option to reactivate it for a period of time that is identified in the Zone deactivation message you confirm. The Zone will remain in the list of Inactive Zones for as long as it's available to be reactivated.
🔔 Future payments for the Zone will be automatically canceled. Any remaining time for use that has not been leveraged will become available as credit for the Zone, should you choose to reactivate it.
Reactivate an Inactive Zone
When you are a Zone owner, follow these steps to reactivate an inactive Zone:
| Step | Action | Visual |
| 1 |
Click the My profile icon. The My profile page for your account appears. |
 |
| 2 |
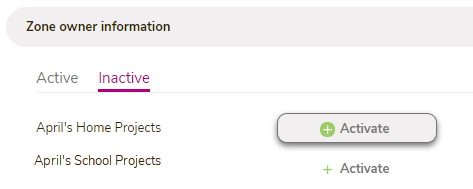
Scroll to the Zone owner information section, and click Inactive to see the Inactive Zones. Click Activate for the Zone you wish to deactivate. |
 |
| 3 |
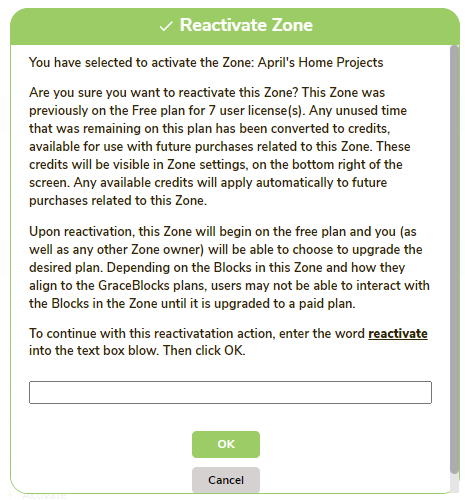
Carefully review the confirmation message that displays. This message explains that even if you were previously on a paid plan, upon reactivation you will start on a Free plan, and any existing credits from the Zone will be available for use, should you choose to upgrade to a paid plan. If your Zone exceeds free plan limits, you will need to choose a plan that aligns with the Zone's utilization. To proceed with reactivation, follow the instructions on this page. |
 |
| 4 |
If you complete step 3 by clicking OK, confirm that the Zone is now Active by clicking the Active tab in the Zone owner information section and verifying that the Zone you re-activated appears in the list. |
🔔 A Zone will only appear as an inactive Zone during the period when it is available for re-activation. This period ranges from three to twelve months, as identified at the time of deactivation. It is based on the plan level at the time of deactivation. If a Zone is no longer listed as Inactive, it has been fully abolished and can no longer be reactivated.
🔔 If the reactivated Zone has any credits that can be applied to future payments, you can find the credit amount on the bottom left corner of the Zone settings page.